Solder, Desolder & Jumper Process in Mobile Repairing are some of the main skills that you need to master to become a good technician. One action you must take is to practice. You have to Practice until you Perfect the skills.
Soldering Process
What is Soldering?
Soldering is the process of joining two terminals together. The necessary tools required are,
- The soldering iron/station – Use a 25W iron for small jobs and 100W for larger jobs. The Soldering has a variable temperature iron which is safer for boards as the tip temperature is adjusted to suit the job size.
- Soldering wire – made of Lead and Tin alloy.
- Soldering paste/flux – is an additive that facilitates the soldering process by removing and preventing oxidation thereby improving the wetting/melting characteristics of the liquid solder.
- Tweezers or clamp – Use tweezers or clamps to hold the components during the process as the components are very small.
- Cutter / Needle nosed Plier.
There are different techniques for soldering various components into the board but the general principle governing the soldering process is as follows and will suffice,
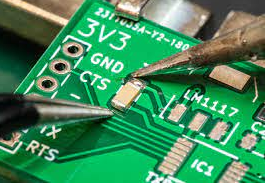
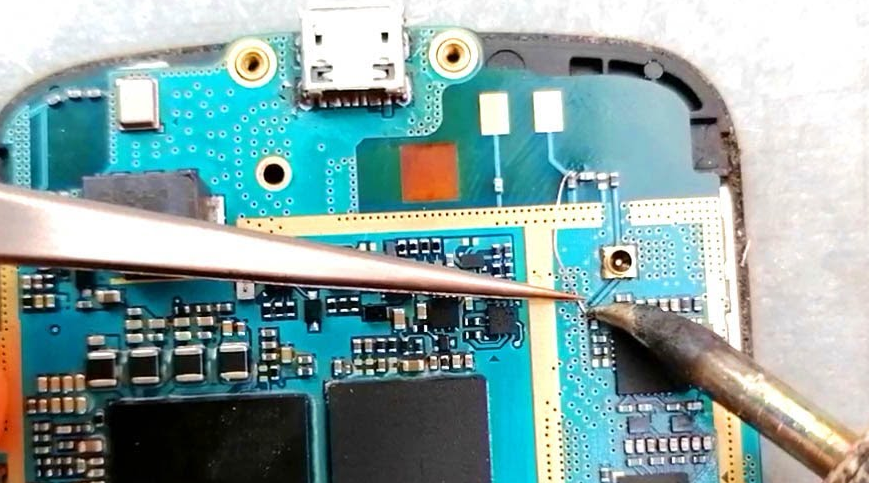
- To Solder a component to the PCB, use a tweezer to place or hold the component in place, which in most cases are small miniature devices. Then with one hand holding the soldering iron, place the iron’s tip first on the pad (contact) while holding the solder wire on the other hand directed at the tip of the iron at the joint between the PCB and the components’ terminal. This way, the hand holding the solder wire controls the amount of solder melted at the joint as it is withdrawn from the joint.
- You may use a clamp to hold the board in place (recommended) or just placed on the work table while you solder the components.
- Prepare the component to be soldered. For cell phone micro size components, use the heat from the iron to moisten the terminal point with a small lead and use a cleaning agent to wipe the surfaces for clean soldering. For bigger components, bend the component leads correctly and carefully to avoid damage, and fit into the PCB board’s terminal position.
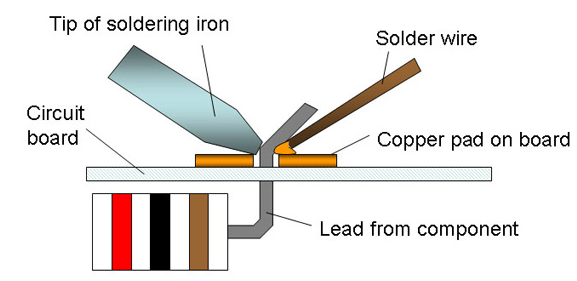
- Next you “tin” the solder. This is done by melting a small drop of solder on the soldering iron tip. This process is called tinning the tip as it helps to improve heat flow from the iron to the lead and pad, safeguarding the board from excessive heat.
- Make solder balls with the iron and lead on the work table.
- Use the iron’s tip to pick a lead ball. Place the soldering iron tip with the tiny lead drop or ball on it on the interface of the pad and lead, making sure it touches both the lead and pad.
- A good joint will look shiny, smooth, and cone-shaped otherwise it may not be good enough to stay strong. Visible indications show that if your joint is good. The solder should melt with the component’s terminal point surface to form an alloy with the metal surface. The solder joint should coat the component’s surface in even distributions. It should neither be too little nor too much.
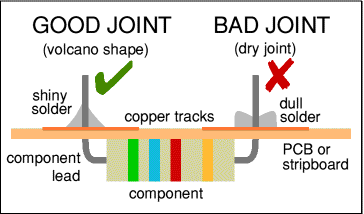
- While carrying out the process you may clean the oxidation off the tip of the iron at intervals to aid heat transfer. After a good joint is made, make sure you allow the joint to cool before moving the components.
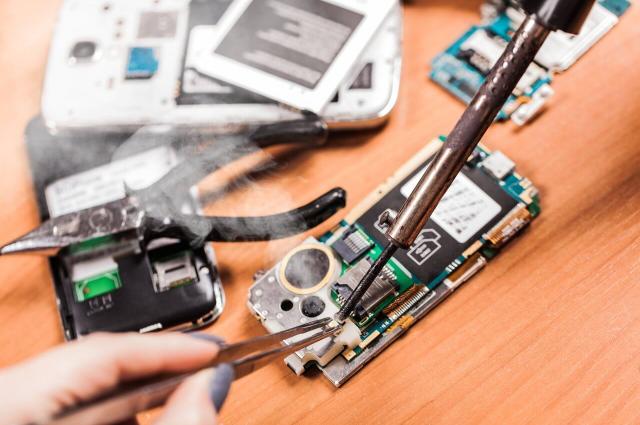
Desoldering Process
Desoldering: Desoldering is the removal of solder and components from a printed circuit board for troubleshooting, repair, replacement, and salvage.
Steps in Desoldering
- Use a solder wick (finely braided copper) to wick away excess solder from a de-soldered connection.
- Apply the solder wick and use the soldering iron to the de-soldered connection. The solder wick will draw the excess solder off the PCB pad.
The following are the steps that you should take when disassembling a mobile phone.
- Switch off the Phone
- Remove the battery cover
- Remove the battery, SIM tray, SIM card memory card (if any)
- Remove all the screws from the phone
- Liftback the cover with the help of a flat screwdriver
- Remove the strips (busser strip, display, camera, volume, and speaker button strips)
- Remove the antenna wire from the outside
- Remove the motherboard and vibrator.
To successfully disassemble a phone, you need to understand the various internal sections of a mobile phone and how they are connected to the CPU. Let us look at that next.
Jumper Process
Jumpering means to temporarily complete a circuit or to bypass a break in a circuit by making a connection from one point to another.
A good conductor wire is used to make a jumper that by-passes the components and passes on a signal or supply line for further use.
When the wire is used as a jumper, it must have some special specifications as required. These jumper wires can mainly be of two types i.e., insulated and non-insulated. In the mobile phone insulated wires are used for jumpers. The length of a jumper depends on the two points connected in between.
Why Do Jumpering:
While repairing mobile phones, we find that certain faulty components are very difficult to get from the market. To repair such mobile phones the only immediate option is the use of jumpers. By use of jumpers, we would bypass the faulty components specifically.
How to Jumper:
- Disassemble the mobile phone and place it on a PCB holder.
- Using a multimeter, check the track and find the fault or the missing track that needs a jumper.
- Apply liquid soldering flux to the points where you need to solder a jumper wire.
- Cut jumper wire to the desired length and remove its lamination using a blade cutter.
- Hold one end of the jumper wire and solder it to one point of the faulty circuit track. Use good quality tweezers to hold the wire and good quality of soldering iron and solder wire to solder.
- Now hold the other end of the jumper wire and solder to the other point of the track.
- Using a multimeter check the jumper.